animate-fireworks
Animate Fireworks Using JavaScript and Canvas
Prerequisites: HTML, CSS, JavaScript fundamentals \ Versions: None
Introduction
The holiday season is a special time for everyone. Christmas and New Year are around the corner, and fireworks will light up the sky. If you can’t wait to see the fireworks in action, I’ve got the answer for you. 🪄
We’re going to make our very own fireworks using JavaScript and the Canvas API. This way, you will be able to show your project to your family and friends and believe me, it will spark a smile on their faces.
By the end, you will create the following:
And it is: let’s code it up!
Setup
Let’s start by setting up the project and the structure. But before that, a quick recap.
💡 What is Canvas API? If you have never worked with it before, no worries! It is fairly simple and so much fun!
Let’s get it rolling! 🎉
Let’s open up the code editor of your choice (we recommend VS Code). If you are using VS Code, search for the “Live Server” extension:
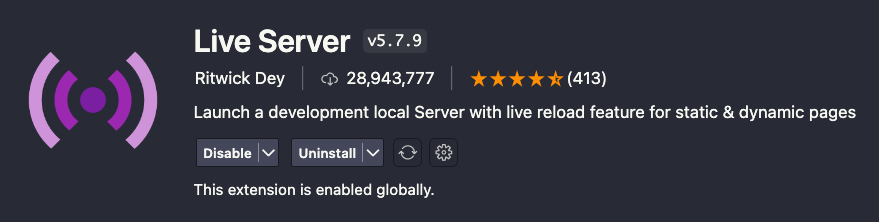
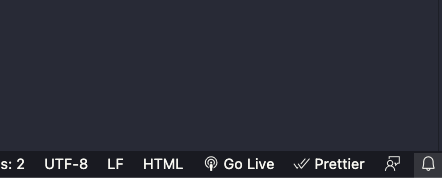
Install it and relaunch the editor. You should see the “Go Live” option in the bottom right corner of your editor.
Next, create a new file called index.html. It will be our starting point — the backbone that our code will rely on.
The next thing we need to do is add the following base code:
<!DOCTYPE html>
<html lang="en">
  <head>
    <meta charset="UTF-8" />
    <meta name="viewport" content="width=device-width, initial-scale=1.0" />
    <title>New Year Fireworks 🎉</title>
    <link rel="stylesheet" href="styles.css" />
  </head>
  <body>
    <!-- We will write more code here -->
  </body>
</html>
Notice that body tags are currently empty. This is where we will place two canvas elements and two script elements in.
In the <body> element, replace the comment with the following snippet:
<body>
  <canvas id="canvas-background"></canvas>
  <canvas id="fireworks"></canvas>
  <script src="canvas-background.js"></script>
  <script src="canvas-fireworks.js"></script>
</body>
As a convention, the value of the id is typically just “canvas”. But since we’ve got two canvases, I decided to name them canvas-background and canvas-fireworks so that we can differentiate between them. This of course can be any name of your choosing, just pick something that is easy to remember.
Now, why do we need two separate canvases? Well, it is because we will have two layers:
- One for the background where we will draw the static assets like figures of Avatars
- One for the dynamic fireworks and interactions. At this step, both script files are empty so let’s quickly add them to our file structure.
Create canvas-background.js and canvas-fireworks.js files, and keep them empty for now. We will come back to it in a second. These files should be in the same directory as the index.html. The base code we pasted in the index.html file links HTML and CSS together.
Let’s also create a styles.css and add some generic code to it:
body {
  margin: 0;
  padding: 0;
  overflow: hidden;
}

h1, p {
  padding: 0;
  margin: 0;
}

canvas {
  cursor: pointer;
  position: absolute;
}
margin: 0 and padding: 0 on body resets the margin and padding on your body as we are going to make the canvas occupy the whole screen and we don’t want to see any white space around it. It’s a good practice to remove paddings and margins from your text elements like h1 and p. Add overflow: hidden to the body tag so that the content will be clipped if necessary to fit the padding box.
It is also essential to set canvas elements to the position absolute as we want to overlay them on top of each other for an immersive experience.
Extend your styles.css with the following:
@import url('https://fonts.googleapis.com/css2?family=Pacifico&display=swap');
@import url('https://fonts.googleapis.com/css2?family=Work+Sans&display=swap');

body {
  margin: 0;
  padding: 0;
  overflow: hidden;
  font-family: 'Pacifico', cursive;
  color: #fff;
}

h1, p {
  padding: 0;
  margin: 0;
}

h1 {
  z-index: 2;
  text-transform: uppercase;
  font-size: 6vw;
  padding: 0 1rem;
}

p {
  z-index: 2;
  text-transform: uppercase;
  font-size: 1.5vw;
  font-family: 'Work Sans', sans-serif;
}

canvas {
  cursor: pointer;
  position: absolute;
}
Add custom fonts. We will use Google fonts. For this tutorial, let’s select Pacifico for h1 and Work Sans for p elements.
Start by importing the fonts on top of the file and set the font family across the entire site to be 'Pacifico', cursive. p elements will have 'Work Sans', sans-serif; set explicitly which will overwrite the default font set on the body.
Since h1 and p will be static elements, we need to make sure that they will overlay the canvases. z-index: 2; does this. (We will set an Avatar image to z-index: 1; later on.)
Let’s quickly recap on rem and vw.
💡 Relative length values are defined in terms of some other value. These are, for example, rem, em, and vw. You can read more on this on MDN Web Docs. Just know, that rem is defined relative to the font size of the root element. If the root element’s font size is not changed by the user this value is normally 16px. vw stands for 1% viewport width. That is to say that if you define the width property as 6vw, the element will take up 6% of the available viewport’s width.
Lastly, There are transparent avatar images created using Canva App. These images can be found in the assets/ folder. Download them and then add them to your own assets/ folder.
Time to launch the live server by clicking on “Go Live” in the bottom right corner of VS Code.
Drawing the Background
In order to get some things on the screen, we’re going to add the background first.
Open your canvas-background.js and add the following code:
// canvas-background.js

const canvas = document.getElementById('canvas-background');
const context = canvas.getContext('2d');
Note: A comment with the file name will be included at the top of each JavaScript code snippet so that you can better tell which snippet goes with which .js file.
The .getElementById() method gets a reference to the HTML <canvas> element. Next, the HTMLCanvasElement.getContext() method gets that element’s rendering context - the thing onto which the drawing will be rendered.
Once you have the initial skeleton set up, two attributes are required when setting up your canvas space. The desired width and height of the canvas need to be set.
First, get the document’s width and height, next set the canvas to take up the whole document’s space:
// canvas-background.js

// get document's width and height
const width = window.innerWidth;
const height = window.innerHeight;

// set background to be fullscreen
canvas.width = width;
canvas.height = height;
Moving forward, wrap your code in an IIFE.
// canvas-background.js

(() => {
  const canvas = document.getElementById('canvas-background');
  const context = canvas.getContext('2d');

  // get document's width and height
  const width = window.innerWidth;
  const height = window.innerHeight;

  // set background to be fullscreen
  canvas.width = width;
  canvas.height = height;
})();
💡 IIFE
Immediately Invoked Function Expression An immediately invoked function expression (IIFE) is one of the most popular design patterns in JavaScript. It pronounces like iify. In short: It is a function expression that invokes itself automatically. Almost like magic! 🪄
An IIFE is composed of three main components:
- A grouping operator: The first pair of parentheses
() - A function: Enclosed within the grouping operator
- An invocator: The last pair of parentheses
()
“Iffy” helps to avoid name collisions and polluting the global namespace. It is often used to execute an async function and create private and public variables and methods.
Now that we know the power of IIFE, let’s move on.
Add our first arrow function to create the background. It will be in radial gradient, so let’s see how to do it:
// canvas-background.js

const drawBackground = () => {
  // The inner circle is at x=0, y=0, with radius=height
  // The outer circle is at x=0, y=0, with radius=width
  const gradient = context.createRadialGradient(0, 0, height, 0, 0, width);
  // offset and color
  gradient.addColorStop(0, '#002D62');
  gradient.addColorStop(0.5, '#0066b2');
  gradient.addColorStop(1, '#6699CC');

  // make canvas the color of gradient
  context.fillStyle = gradient;
  // place its top-left corner at (0, 0), and
  // and give it a size of "width" wide by "height" tall.
  context.fillRect(0, 0, width, height);
};

drawBackground();
Call drawBackground() at the bottom but within your IIFE.
This will generate a smooth radial gradient from the left upper corner down to the right bottom corner. The .createRadialGradient() method creates a radial gradient using the size and coordinates of two circles. To be applied to a shape, the gradient must first be assigned to the fillStyle property.
💡 The .createRadialGradient() method is specified by six parameters, three defining the gradient’s start circle, and three defining the end circle. A radial CanvasGradient initialized with the two specified circles will be returned.
createRadialGradient(x0, y0, r0, x1, y1, r1)
You can find more about it in the MDN Web Docs.
Notice three color stops between the gradient’s two circles are then created. addColorStop() method is being used taking in an offset and a color as arguments. Keep in mind, your offset needs to be a number between 0 and 1, where 0 is the start and 1 is the end of the gradient. Finally, the gradient is assigned to the canvas context and is rendered to a filled rectangle.
To draw the foreground — represented by a dark blue pedestal at the bottom — extend the file with the following function:
// canvas-background.js

const drawForeground = () => {
  context.fillStyle = '#13274F';
  context.fillRect(0, height * 0.95, width, height);

  context.fillStyle = '#002D62';
  context.fillRect(0, height * 0.955, width, height);
};

drawForeground();
Call drawForeground() at the bottom but within your IIFE.
This will create a base on the last 5% of the canvas (height * 95%). At this step, you should have the following on the screen:

Your canvas-background.js file should contain the following code by now:
// canvas-background.js

(() => {
  const canvas = document.getElementById('canvas-background'); // gets a reference to the HTML <canvas> element
  const context = canvas.getContext('2d'); // get the rendering context for the canvas

  // get document's width and height
  const width = window.innerWidth;
  const height = window.innerHeight;

  // set background to be fullscreen
  canvas.width = width;
  canvas.height = height;

  const drawBackground = () => {
    // The inner circle is at x=0, y=0, with radius=height
    // The outer circle is at x=0, y=0, with radius=width
    const gradient = context.createRadialGradient(0, 0, height, 0, 0, width);
    // offset and color
    gradient.addColorStop(0, '#002D62');
    gradient.addColorStop(0.5, '#0066b2');
    gradient.addColorStop(1, '#6699CC');

    // make canvas the color of gradient
    context.fillStyle = gradient;
    // place its top-left corner at (0, 0), and
    // and give it a size of "width" wide by "height" tall.
    context.fillRect(0, 0, width, height);
  };

  const drawForeground = () => {
    context.fillStyle = '#13274F';
    context.fillRect(0, height * 0.95, width, height);

    context.fillStyle = '#002D62';
    context.fillRect(0, height * 0.955, width, height);
  };

  drawBackground();
  drawForeground();
})();
Adding Avatars
Remember in the setup you have added the images to your assets folder. Well, well! Let’s use them.
Avatars are static assets and those will be added to the scene within the HTML code. We will add some styling to position them on the page as well as JavaScript to toggle our heroes. Among them, we will introduce Santa Claus and his friends: reindeer, bear, snowman, and of course, cookie.
Go back to index.html and add the following code snippet in between the body tag right before the first canvas:
<div class="image-container">
  <img id="avatar" src="./assets/santa.png" alt="avatar" />
</div>
Add one more script tag before the other script tags:
<script src="avatar-toggle.js"></script>
Your code should look like this:
<!DOCTYPE html>
<html lang="en">
  <head>
    <meta charset="UTF-8" />
    <meta name="viewport" content="width=device-width, initial-scale=1.0" />
    <title>New Year Fireworks 🎉</title>
		// Add favicon
    <link rel="icon" type="image/x-icon" href="./assets/santa.png" />
    <link rel="stylesheet" href="styles.css" />
  </head>
  <body>
    <div class="image-container">
      <img id="avatar" src="./assets/santa.png" alt="avatar" />
    </div>
    <canvas id="canvas-background"></canvas>
    <canvas id="canvas-fireworks"></canvas>

    <script src="avatar-toggle.js"></script>
    <script src="canvas-background.js"></script>
    <script src="canvas-fireworks.js"></script>
  </body>
</html>
Notice that we added a favicon. This tiny icon will be displayed in your tab which makes it very festive. The image is just one of the avatar images from your asset folder.
We also added another script tag where the JavaScript magic for toggling avatars will happen.
Let’s quickly add the following styling to the div that wraps the image and img tag.
In your styles.css file, add the following after the p tag styling:
.image-container {
  display: flex;
  z-index: 1;
  height: 20%;
  width: 100%;
  justify-content: center;
}

img {
  z-index: 1;
  bottom: 5%;
}
Also, add img to have position absolute and cursor pointer. We can just chain it before the canvas.
img, canvas {
  cursor: pointer;
  position: absolute;
}
What’s next? Your guess is correct. Create a new file called avatar-toggle.js and add the following code:
// avatar-toggle.js
const image = document.getElementById('avatar');

image.addEventListener('click', function () {
  if (image.src.match('./assets/santa.png')) {
    image.src = './assets/reindeer.png';
  } else if (image.src.match('./assets/reindeer.png')) {
    image.src = './assets/bear.png';
  } else if (image.src.match('./assets/bear.png')) {
    image.src = './assets/cookie.png';
  } else {
    image.src = './assets/santa.png';
  }
});
So what’s going on? Let’s find out. It’s pretty simple!
First, get an element by id. Remember, that the img tag in your html document has an id of avatar. This allows us to target it and use it for JavaScript manipulations.
Next up is where the trick happens. And it is as simple as attaching an event listener to the grabbed image and playing with if else statement.
Note: If you didn’t know, JavaScript has a match() method that compares strings with a regular expression (regex). Or in other words, we can say that it is used to search string objects with any regex. But you can also pass a path to the image to it and it will work because it is just a string. Here’s a simple but useful method I’d like to introduce you to.
Adding Typography
The same thing as with img, we will add static typography to our site.
In index.html, add this snippet to your <body> element (right before the <div> element with an id of "image-container"):
<div class="text-container">
  <h1>Ho Ho Ho!</h1>
  <p>Click on the avatar to pick your hero</p>
</div>
Your final index.html should look like this:
<!DOCTYPE html>
<html lang="en">
  <head>
    <meta charset="UTF-8" />
    <meta name="viewport" content="width=device-width, initial-scale=1.0" />
    <title>New Year Fireworks 🎉</title>
    <link rel="icon" type="image/x-icon" href="./assets/santa.png" />
    <link rel="stylesheet" href="styles.css" />
  </head>
  <body>
    <div class="text-container">
      <h1>Ho Ho Ho!</h1>
      <p>Click on the avatar to pick your hero</p>
    </div>
    <div class="image-container">
      <img id="avatar" src="./assets/santa.png" alt="avatar" />
    </div>
    <canvas id="canvas-background"></canvas>
    <canvas id="canvas-fireworks"></canvas>

    <script src="avatar-toggle.js"></script>
    <script src="canvas-background.js"></script>
    <script src="canvas-fireworks.js"></script>
  </body>
</html>
Now, let’s add some styles and animation to our typography. Navigate to styles.css. Your final CSS should look like this:
@import url('https://fonts.googleapis.com/css2?family=Pacifico&display=swap');
@import url('https://fonts.googleapis.com/css2?family=Work+Sans&display=swap');

body {
  margin: 0;
  padding: 0;
  overflow: hidden;
  font-family: 'Pacifico', cursive;
  color: #fff;
}

h1, p {
  padding: 0;
  margin: 0;
}

/* add this */
.text-container {
  display: flex;
  flex-direction: column;
  position: absolute;
  top: 5%;
  width: 100%;
  height: 20%;
  z-index: 1;
  justify-content: center;
  align-items: center;
}

/* extend this */
h1 {
  z-index: 2;
  text-transform: uppercase;
  font-size: 6vw;
  padding: 0 1rem;
  background-image: linear-gradient(
    to right top,
    #ffff34,
    #ffc812,
    #ff8f2f,
    #e44d2e,
    #9e1b32
  );
  background-size: 50% auto;
  -webkit-background-clip: text;
  -webkit-text-fill-color: transparent;
  animation: gradientAnimation 7.5s ease alternate infinite;
}

/* add this */
@keyframes gradientAnimation {
  to {
    background-position: 100% top;
  }
}

p {
  z-index: 2;
  text-transform: uppercase;
  font-size: 1.5vw;
  font-family: 'Work Sans', sans-serif;
}

img {
  z-index: 1;
  bottom: 5%;
}

.image-container {
  display: flex;
  z-index: 1;
  height: 20%;
  width: 100%;
  justify-content: center;
}

img,
canvas {
  cursor: pointer;
  position: absolute;
}
Notice the comments before the selectors that should be extended or added.
.text-container is a wrapper around h1 and p. It will help us position texts to the top middle. For that, we use a flex container. The rest properties on .text-container selector help to make it a bit prettier.
Extended h1 by adding colorful animation. You can play around with it to create your custom gradient and transition.
At this point, our animation should look like this:
To finish up the static part, let’s draw some stars on the background canvas.
Drawing Stars
Next, let’s draw stars! ✨
In canvas-background.js, to make the stars easily customizable, add a numOfStars variable at the top of the file, as well as a helper function for generating random numbers between two values (right after setting the background to be fullscreen):
// canvas-background.js

const numOfStars = 50;
// helper function for generating random numbers between two values
const random = (min, max) => Math.random() * (max - min) + min;
And to draw the stars, add the drawStars() function to the end of the file:
// canvas-background.js

const drawStars = () => {
  let countOfStars = numOfStars;

  context.fillStyle = '#E6E6FA';

  while (countOfStars--) {
    const x = random(25, width - 50);
    const y = random(25, height * 0.5);
    const size = random(1, 4);

    context.fillRect(x, y, size, size);
  }
};
It will create 50 stars in the view, at random positions, with random sizes, but not below half of the screen. height * 0.5 is responsible for it. To avoid getting stars drawn to the edge of the screen, a padding of 25px should be added. Notice the first argument in both random functions is 25.
As a result, the upper half of the page will display stars, and padding of 25px will get added.
Don’t forget to call the function at the bottom but within your IIFE.
Your final canvas-background.js file should look like this:
// canvas-background.js

(() => {
  // gets a reference to the HTML <canvas> element
  const canvas = document.getElementById('canvas-background');

  // get the rendering context for the canvas
  const context = canvas.getContext('2d');

  // get document's width and height
  const width = window.innerWidth;
  const height = window.innerHeight;

  // set background to be fullscreen
  canvas.width = width;
  canvas.height = height;

  const numOfStars = 50;

  // helper function for generating random numbers between two values
  const random = (min, max) => Math.random() * (max - min) + min;

  const drawBackground = () => {
    // The inner circle is at x=0, y=0, with radius=height
    // The outer circle is at x=0, y=0, with radius=width
    const gradient = context.createRadialGradient(0, 0, height, 0, 0, width);
    // offset and color
    gradient.addColorStop(0, '#002D62');
    gradient.addColorStop(0.5, '#0066b2');
    gradient.addColorStop(1, '#6699CC');

    // make canvas the color of gradient
    context.fillStyle = gradient;
    // place its top-left corner at (0, 0), and
    // and give it a size of "width" wide by "height" tall.
    context.fillRect(0, 0, width, height);
  };

  const drawForeground = () => {
    context.fillStyle = '#13274F';
    context.fillRect(0, height * 0.95, width, height);

    context.fillStyle = '#002D62';
    context.fillRect(0, height * 0.955, width, height);
  };

  const drawStars = () => {
    let countOfStars = numOfStars;

    context.fillStyle = '#E6E6FA';

    while (countOfStars--) {
      const x = random(25, width - 50);
      const y = random(25, height * 0.5);
      const size = random(1, 4);

      context.fillRect(x, y, size, size);
    }
  };

  drawBackground();
  drawForeground();
  drawStars();
})();
And you are done with adding static content, CSS, and avatar toggling. Chapeau! 👒
Your site should look like this by now:

Time for Dynamic Add-Ons!
…and for the most interesting part where you will work with the second canvas.
Once again, you want to give the same height and width for this canvas element as for the background. A better way than this would be to have a separate file or function that handles setting up all canvases. That way, you won’t have code duplication. It is possible using ES Modules but as this is not part of this tutorial, we encourage you to look into it later and maybe even refactor your current code structure. But let’s get back to our fireworks!
Add the following code to canvas-fireworks.js:
// canvas-fireworks.js

(() => {
  // gets a reference to the HTML <canvas> element
  const canvas = document.getElementById('canvas-fireworks');

  // get the rendering context for the canvas
  const context = canvas.getContext('2d');

  // get document's width and height
  const width = window.innerWidth;
  const height = window.innerHeight;

  // set background to be fullscreen
  canvas.width = width;
  canvas.height = height;

  const positions = {
    mouseX: 0,
    mouseY: 0,
    anchorX: 0,
    anchorY: 0,
  };

})();
This time, we’ve also added a positions object that will hold the x and y coordinates both for the mouse as well as for the anchor.
Next up, you want to define an anchor point. This will serve as a starting point for shooting the fireworks.
Add this function:
// canvas-fireworks.js

const drawAnchor = () => {
  // get the position for the anchor on the canvas
  positions.anchorX = width / 2;
  positions.anchorY = height * 0.9;

  context.clearRect(0, 0, width, height);

  // save context to remove transformation afterwards
  context.save();

  context.translate(positions.anchorX, positions.anchorY);

  // restores the empty context state
  context.restore();
};
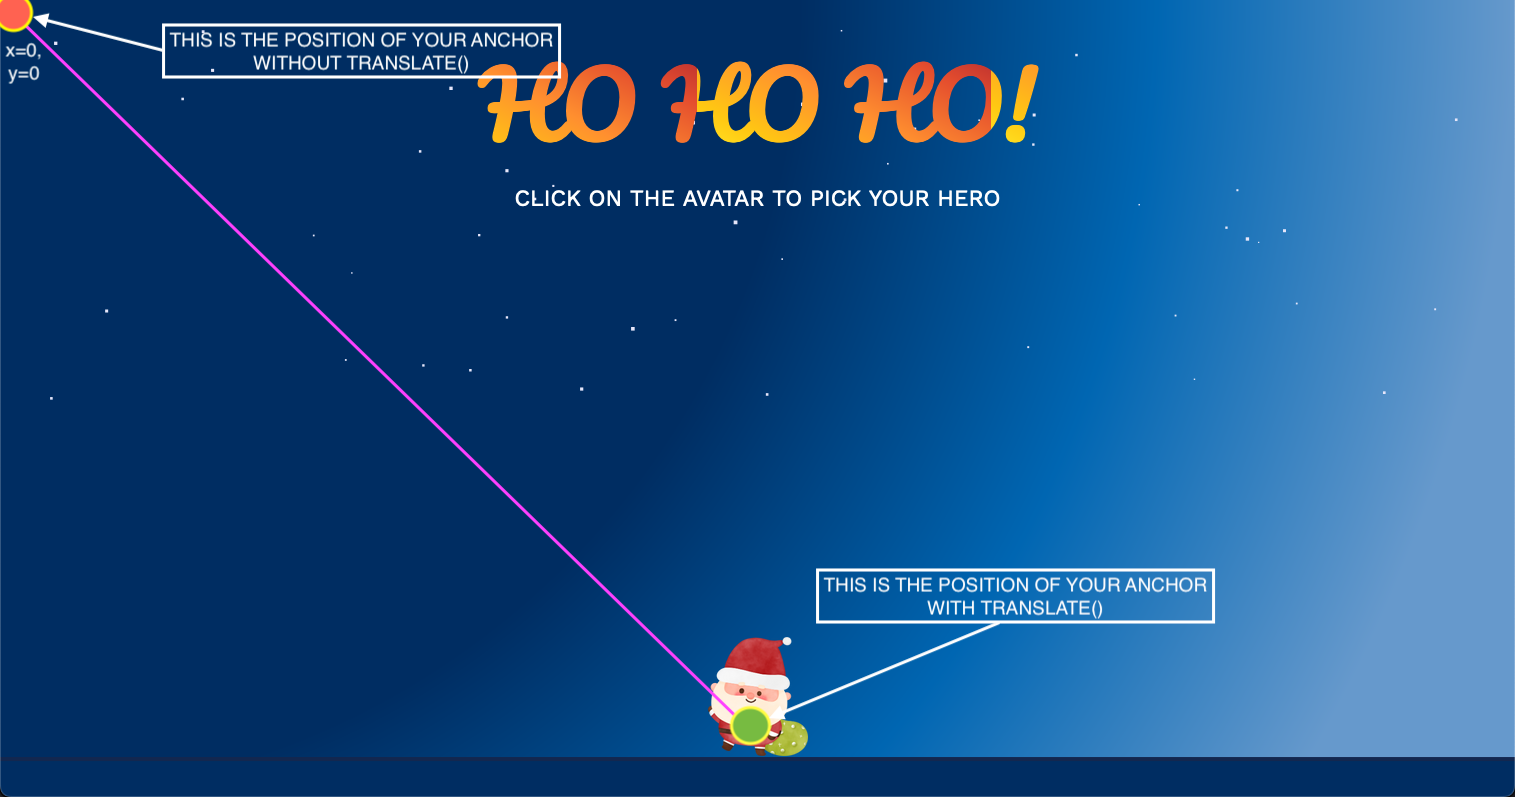
Let’s shortly dive into it. First, we get the position of the anchor on the canvas on the X and Y axes. Basically, we want it to be right behind an avatar. This will create the effect of an avatar getting a bit rowdy and starting to shoot fireworks into the sky. 🎆
We need to clear the context every time before running the function again. If we don’t do it, then the fireworks will stay frozen on the screen. .clearRect() method does this job by erasing the pixels in a rectangular area.
We also need to save this state to be able to translate the positions.
We do it with save() method that will save the entire state of the canvas by pushing the current state onto a stack. But don’t worry about it. 😇 You just need to know that we are clearing the canvas and saving its new empty state before moving on. Skipping ahead, at the end of the function we use restore() method. It will restore the saved context once the function reaches its end. This way translate calls will not add up.
So what does translate do?
The translate() method adds a translation transformation to the current matrix by moving the canvas and its origin x units horizontally and y units vertically on the grid.
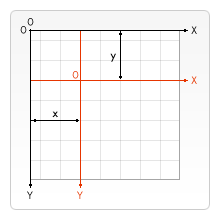
In simple words, it will determine the spot on the canvas where our fireworks will burst.
Alright, so where do we use this function?
Add the following code right after drawAnchor() function:
// canvas-fireworks.js

// listen to the mousemove event and
const attachEventListeners = () => {
  canvas.addEventListener('mousemove', (e) => {
    // set the mouse positions to the correct coordinates
    positions.mouseX = e.pageX;
    positions.mouseY = e.pageY;
  });
};

const loop = () => {
  requestAnimationFrame(loop); // call the loop function indefinitely and redraw the screen every frame
  drawAnchor();
};

window.addEventListener('load', () => {
  attachEventListeners();
  loop();
});
Once the window is loaded, you want to attach the event listeners as well as call a loop function for setting up the anchor. For the event listener, you want to listen to the mousemove event and set the mouse positions to the correct coordinates.
requestAnimationFrame(loop) will call the loop function indefinitely and redraw the screen every frame. This function is asynchronous so it doesn’t make much difference whether you will place it before drawAnchor() or after. In the second scenario, you would be able to add conditionals, but we won’t cover them right now.
By now, canvas-fireworks.js should contain the following code:
// canvas-fireworks.js

(() => {
  // gets a reference to the HTML <canvas> element
  const canvas = document.getElementById('canvas-fireworks');

  // get the rendering context for the canvas
  const context = canvas.getContext('2d');

  // get document's width and height
  const width = window.innerWidth;
  const height = window.innerHeight;

  // set background to be fullscreen
  canvas.width = width;
  canvas.height = height;

  const positions = {
    mouseX: 0,
    mouseY: 0,
    anchorX: 0,
    anchorY: 0,
  };

  const drawAnchor = () => {
    // get the position for the anchor on the canvas
    positions.anchorX = width / 2;
    positions.anchorY = height * 0.9;

    context.clearRect(0, 0, width, height);

    // save context to remove transformation afterwards
    context.save();

    context.translate(positions.anchorX, positions.anchorY);

    // restores the empty context state
    context.restore();
  };

  const attachEventListeners = () => {
  // listen to the mousemove event and
  // set the mouse positions to the correct coordinates
    canvas.addEventListener('mousemove', (e) => {
      positions.mouseX = e.pageX;
      positions.mouseY = e.pageY;
    });
  };

  const loop = () => {
    requestAnimationFrame(loop); // call the loop function indefinitely and redraw the screen every frame
    drawAnchor();
  };

  window.addEventListener('load', () => {
    attachEventListeners();
    loop();
  });
})();
Shooting Crackers 🎇
Finally! We are now at the point where we will have these crackers bursting! To help keep things more customizable, set up some variables and helper functions at the top of the file right after the positions object:
// canvas-fireworks.js

const fireworks = [];
const flecks = [];
const flecks2 = [];
const flecks3 = [];
const numberOfFlecks = 25; //  bear in mind: performance gets worse with higher number of flecks

const random = (min, max) => Math.random() * (max - min) + min;

// calculate the distance between two points
// using Pythagorean theorem
// d = √x² + y², where x = x1 - x2, and y = y1 - y2
const getDistance = (x1, y1, x2, y2) => {
  const xDistance = x1 - x2;
  const yDistance = y1 - y2;

  return Math.sqrt(Math.pow(xDistance, 2) + Math.pow(yDistance, 2));
};

let mouseClicked = false;
Add four arrays for holding each firework, and eventually, the particles, or flecks, associated with them. We want three firework bursts and for that, we need to have three arrays of flecks.
Moving on, add a variable for the number of flecks, so it’s easier to tweak them. Bear in mind that performance will degrade fast if you increase the number of flecks. You also want a variable for keeping track of if the mouse is clicked. And lastly, include a function for calculating the distance between two points. For that, we can use the Pythagorean theorem.

You need to track mouse-click events, so add the following two event listeners to the attachEventListeners function:
// canvas-fireworks.js

const attachEventListeners = () => {
  // listen to the mousemove event
  canvas.addEventListener('mousemove', (e) => {
    // set the mouse positions to the correct coordinates
    positions.mouseX = e.pageX;
    positions.mouseY = e.pageY;
  });

  // track mouse click events
  canvas.addEventListener('mousedown', () => (mouseClicked = true));
  canvas.addEventListener('mouseup', () => (mouseClicked = false));
};
Our fireworks are going to be set off based on the value of mouseClicked variable. If it is true, then we want to draw fireworks. If it is false, then we want to stop drawing fireworks.
To create new fireworks, we will use a class with an init function inside it:
Add this code at the bottom of your IIFE function:
// canvas-fireworks.js

class Firework {
  constructor() {
    const init = () => {
      // Create the firework object
      ...
    }

    init();
  }
}
Inside of init() you want to initialize the default values of each firework object, such as its coordinates, target coordinates, or color.
// canvas-fireworks.js

class Firework {
  constructor() {
    const init = () => {
      // current coordinates
      this.x = positions.anchorX;
      this.y = positions.anchorY;

      // target coordinates
      this.target_x = positions.mouseX;
      this.target_y = positions.mouseY;

      // distance from starting point to target
      this.distanceToTarget = getDistance(
        this.x,
        this.y,
        this.target_x,
        this.target_y
      );
      this.distanceTraveled = 0;

      this.coordinates = [];
      this.angle = Math.atan2(
        this.target_y - positions.anchorY,
        this.target_x - positions.anchorX
      );
      this.speed = 15;
      this.friction = 0.99;
      this.hue = random(0, 360);

      while (fireworkLength--) {
        this.coordinates.push([this.x, this.y]);
      }
    }
    init();
  }
}
First, add the length of the firework. The higher this value is, the longer the tail will be. Add the x, y, and target_x, target_y values. They will hold the initial and target coordinates. Initially, they will always equal the position of the anchor and the position where the
click occurred.
Based on these values, you can use the getDistance function we defined earlier to get the distance between the two points on the canvas. And you also want to add a property distanceTraveled to keep track of the traveled distance. Set it to 0 for now.
Additionally, you need to keep track of the coordinates, their angle, and speed in order to calculate the velocities. As well as a random color defined as hue.
Call init() method at the bottom of the class.
Drawing Fireworks
Are you ready to draw some fireworks? Then let’s go!
Add a new method to the Firework class called draw. It will draw each firework based on the defined values.
After init method, add a new draw method:
// canvas-fireworks.js

this.draw = (index) => {
  context.beginPath();
  context.moveTo(
    this.coordinates[this.coordinates.length - 1][0],
    this.coordinates[this.coordinates.length - 1][1]
  );
  context.lineTo(this.x, this.y);

  context.strokeStyle = `hsl(${this.hue}, 100%, 50%)`;
  context.stroke();

  this.animate(index);
};
It will take in the index from the fireworks array and pass it down to the animate method that we will add in a moment.
To draw the trails, you want to draw a line from the very last coordinates from the coordinates array to the current x and y positions.
For the color, we can use HSL notation, where we give it a random hue, 100% saturation, and 50% brightness.
This however won’t complete the job. In order to see the fireworks, you need to animate them:
Before draw the method, add a new method called animate. Add the following code to it:
// canvas-fireworks.js

this.animate = (index) => {
  this.coordinates.pop();
  this.coordinates.unshift([this.x, this.y]);

  this.speed *= this.friction;

  let velocity_x = Math.cos(this.angle) * this.speed;
  let velocity_y = Math.sin(this.angle) * this.speed;

  this.distanceTraveled = getDistance(
    positions.anchorX,
    positions.anchorY,
    this.x + velocity_x,
    this.y + velocity_y
  );

  if (this.distanceTraveled >= this.distanceToTarget) {
    let i = numberOfFlecks;
    fireworks.splice(index, 1);
  } else {
    this.x += velocity_x;
    this.y += velocity_y;
  }
};
Let’s have a look at the animate method. It will pop, or remove, the last item from the coordinates array, and create a new entry at the beginning of the array via unshift.
Next, it reassigns the speed to friction, and this way slows down the firework (by 1% each frame) as it reaches its destination.
You also want to get the velocity for both axis based on the formula:

These values are used for updating the x and y coordinates of the firework, as long as it didn’t reach its final destination.
How can we verify that a firework has reached its final destination? Well, just get the distance between the anchor and its current positions, including the velocities, and check it against the target distance. For that, use our helper function defined at the top getDistance.
Finally, you want to create as many flecks as you have defined at the beginning of the
file. Don’t forget to remove the fireworks from the array once it’s exploded using splice.
Lastly, to create these new fireworks, add the following to your loop:
// canvas-fireworks.js

if (mouseClicked) {
  fireworks.push(new Firework());
}

let fireworkIndex = fireworks.length;
while (fireworkIndex--) {
  fireworks[fireworkIndex].draw(fireworkIndex);
}
Your Firework class should have the following code by now:
// canvas-fireworks.js

class Firework {
  constructor() {
    const init = () => {
      let fireworkLength = 8;

      // current coordinates
      this.x = positions.anchorX;
      this.y = positions.anchorY;

      // target coordinates
      this.target_x = positions.mouseX;
      this.target_y = positions.mouseY;

      // distance from starting point to target
      this.distanceToTarget = getDistance(
        this.x,
        this.y,
        this.target_x,
        this.target_y
      );
      this.distanceTraveled = 0;

      this.coordinates = [];
      this.angle = Math.atan2(
        this.target_y - positions.anchorY,
        this.target_x - positions.anchorX
      );
      this.speed = 15;
      this.friction = 0.99;
      this.hue = random(0, 360);

      while (fireworkLength--) {
        this.coordinates.push([this.x, this.y]);
      }
    };

    this.animate = (index) => {
      this.coordinates.pop();
      this.coordinates.unshift([this.x, this.y]);

      this.speed *= this.friction;

      let velocity_x = Math.cos(this.angle) * this.speed;
      let velocity_y = Math.sin(this.angle) * this.speed;

      this.distanceTraveled = getDistance(
        positions.anchorX,
        positions.anchorY,
        this.x + velocity_x,
        this.y + velocity_y
      );

      if (this.distanceTraveled >= this.distanceToTarget) {
        let i = numberOfFlecks;
        fireworks.splice(index, 1);
      } else {
        this.x += velocity_x;
        this.y += velocity_y;
      }
    };

    this.draw = (index) => {
      context.beginPath();
      context.moveTo(
        this.coordinates[this.coordinates.length - 1][0],
        this.coordinates[this.coordinates.length - 1][1]
      );
      context.lineTo(this.x, this.y);

      context.strokeStyle = `hsl(${this.hue}, 100%, 50%)`;
      context.stroke();

      this.animate(index);
    };

    init();
  }
}
And your loop function should look like this by now:
// canvas-fireworks.js

const loop = () => {
  requestAnimationFrame(loop); // call the loop function indefinitely and redraw the screen every frame
  drawAnchor();
  if (mouseClicked) {
    fireworks.push(new Firework());
  }

  let fireworkIndex = fireworks.length;
  while (fireworkIndex--) {
    fireworks[fireworkIndex].draw(fireworkIndex);
  }
};
This will initiate a new Firework, every time the mouse is clicked. Until the array gets empty, it will draw, and animate your fireworks.
Adding Flecks ✨
You are LITERALLY at the last section of this lesson. How far have you gone? Let’s finish this up by adding flecks to create a beautiful effect of the fireworks bursting once the trail reaches the destination.
Just as for the fireworks, create a new class with an init called Fleck.
// canvas-fireworks.js

class Fleck {
  constructor(x, y) {
    const init = () => {
      this.x = x;
      this.y = y;
      ...
    }

    init();
  }
}
The constructor will take x and y coordinates as parameters. In init, we set this parameter to this.x and this.y. It will allow us to use them within the init method.
For the init, we will have similar properties as for fireworks.
// canvas-fireworks.js

class Fleck {
  constructor(x, y) {
    const init = () => {
      this.x = x;
      this.y = y;

      let fleckLength = 7;
      this.coordinates = [];

      this.angle = random(0, Math.PI * 2);
      this.speed = random(1, 10);

      this.friction = 0.95;
      this.gravity = 2;

      this.hue = random(0, 360);
      this.alpha = 1;
      this.decay = random(0.015, 0.03);

      while (fleckLength--) {
        this.coordinates.push([this.x, this.y]);
      }
    }

    init();
  }
}
To start with, define the length of the flecks, and assign a random angle and speed to each individual fleck. random(0, Math.PI * 2) will generate a random radian, with every possible direction.
friction and gravity will slow down flecks and make sure they fall downwards. For colors, define a random hue, and this time, an alpha for transparency. Add a decay value, which is used to tell how fast each particle should fade out.
Now, how can we actually draw the flecks? Let’s see.
For drawing, add the draw method after the init method:
// canvas-fireworks.js

class Fleck {
  constructor(x, y) {
    const init = () => {
      this.x = x;
      this.y = y;

      let fleckLength = 7;
      this.coordinates = [];

      this.angle = random(0, Math.PI * 2);
      this.speed = random(1, 10);

      this.friction = 0.95;
      this.gravity = 2;

      this.hue = random(0, 360);
      this.alpha = 1;
      this.decay = random(0.015, 0.03);

      while (fleckLength--) {
        this.coordinates.push([this.x, this.y]);
      }
    }

    // add this
    this.draw = (index) => {
      context.beginPath();
      context.moveTo(
        this.coordinates[this.coordinates.length - 1][0],
        this.coordinates[this.coordinates.length - 1][1]
      );
      context.lineTo(this.x, this.y);

      context.strokeStyle = `hsla(${this.hue}, 100%, 50%, ${this.alpha})`;
      context.stroke();

      this.animate(index);
    };

    init();
  }
}
Here the same logic that is used for the fireworks trail is applied. The only difference is, that the strokeStyle also contains an alpha value to fade out the flecks over time.
Now, let’s animate the flecks by adding the animate method. As you can see, this class has the same structure as Firework.
// canvas-fireworks.js

class Fleck {
  constructor(x, y) {
    const init = () => {
      this.x = x;
      this.y = y;

      let fleckLength = 7;
      this.coordinates = [];

      this.angle = random(0, Math.PI * 2);
      this.speed = random(1, 10);

      this.friction = 0.95;
      this.gravity = 2;

      this.hue = random(0, 360);
      this.alpha = 1;
      this.decay = random(0.015, 0.03);

      while (fleckLength--) {
        this.coordinates.push([this.x, this.y]);
      }
    }

    // add this
    this.animate = (index) => {
      this.coordinates.pop();
      this.coordinates.unshift([this.x, this.y]);

      this.speed *= this.friction;
      this.x += Math.cos(this.angle) * this.speed;
      this.y += Math.sin(this.angle) * this.speed + this.gravity;

      this.alpha -= this.decay;

      if (this.alpha <= this.decay) {
        flecks.splice(index, 1);
        flecks2.splice(index, 1);
        flecks3.splice(index, 1);
      }
    };

    this.draw = (index) => {
      context.beginPath();
      context.moveTo(
        this.coordinates[this.coordinates.length - 1][0],
        this.coordinates[this.coordinates.length - 1][1]
      );
      context.lineTo(this.x, this.y);

      context.strokeStyle = `hsla(${this.hue}, 100%, 50%, ${this.alpha})`;
      context.stroke();

      this.animate(index);
    };

    init();
  }
}
The same principle, start by getting rid of the last item in the coordinates and adding a new one to the beginning of the array with unshift. Then reassign speed to slow each fleck down over time, and don’t forget to apply velocities for the x and y coordinates. Finally, the alpha value can be decreased in each frame until the fleck is not visible anymore. Once it’s invisible, it can be removed from the array.
One very important thing is to add the following code snippet to the animate method of the Firework (!) class right before splicing the firework.
// canvas-fireworks.js

while (i--) {
  flecks.push(new Fleck(this.target_x, this.target_y));
  flecks2.push(new Fleck(this.target_x + 50, this.target_y - 50));
  flecks3.push(new Fleck(this.target_x - 100, this.target_y - 100));
}
// canvas-fireworks.js

// animate method within the Firework (!) class
this.animate = (index) => {
  this.coordinates.pop();
  this.coordinates.unshift([this.x, this.y]);

  this.speed *= this.friction;

  let velocity_x = Math.cos(this.angle) * this.speed;
  let velocity_y = Math.sin(this.angle) * this.speed;

  this.distanceTraveled = getDistance(
    positions.anchorX,
    positions.anchorY,
    this.x + velocity_x,
    this.y + velocity_y
  );

  if (this.distanceTraveled >= this.distanceToTarget) {
    let i = numberOfFlecks;

    // Add this!
    while (i--) {
      flecks.push(new Fleck(this.target_x, this.target_y));
      flecks2.push(new Fleck(this.target_x + 50, this.target_y - 50));
      flecks3.push(new Fleck(this.target_x - 100, this.target_y - 100));
    }

    fireworks.splice(index, 1);
  } else {
    this.x += velocity_x;
    this.y += velocity_y;
  }
};
This will actually add the flecks to their corresponding arrays and position them relative to each other when the firework or better to say its trail, itself will get drawn.
Finally, remember to add the while loop to the loop function you have for the fireworks:
// canvas-fireworks.js

let fleckIndex = flecks.length;
while (fleckIndex--) {
  flecks[fleckIndex].draw(fleckIndex);
}

let fleckIndex2 = flecks2.length;
while (fleckIndex2--) {
  flecks2[fleckIndex2].draw(fleckIndex2);
}

let fleckIndex3 = flecks3.length;
while (fleckIndex3--) {
  flecks3[fleckIndex3].draw(fleckIndex3);
}
The complete loop function should look like this:
// canvas-fireworks.js

const loop = () => {
    requestAnimationFrame(loop); // call the loop function indefinitely and redraw the screen every frame
    drawAnchor();
    if (mouseClicked) {
      fireworks.push(new Firework());
    }

    let fireworkIndex = fireworks.length;
    while (fireworkIndex--) {
      fireworks[fireworkIndex].draw(fireworkIndex);
    }

    let fleckIndex = flecks.length;
    while (fleckIndex--) {
      flecks[fleckIndex].draw(fleckIndex);
    }

    let fleckIndex2 = flecks2.length;
    while (fleckIndex2--) {
      flecks2[fleckIndex2].draw(fleckIndex2);
    }

    let fleckIndex3 = flecks3.length;
    while (fleckIndex3--) {
      flecks3[fleckIndex3].draw(fleckIndex3);
    }
  };
And the complete canvas-fireworks.js has the following code:
// canvas-fireworks.js

(() => {
  // Generic Canvas Setup

  // gets a reference to the HTML <canvas> element
  const canvas = document.getElementById('canvas-fireworks');

  // get the rendering context for the canvas
  const context = canvas.getContext('2d');

  // get document's width and height
  const width = window.innerWidth;
  const height = window.innerHeight;

  // set background to be fullscreen
  canvas.width = width;
  canvas.height = height;

  const positions = {
    mouseX: 0,
    mouseY: 0,
    anchorX: 0,
    anchorY: 0,
  };

  // Variables and helper functions
  const fireworks = [];
  const flecks = [];
  const flecks2 = [];
  const flecks3 = [];
  const numberOfFlecks = 25; //  bear in mind: performance gets worse with higher number of flecks

  const random = (min, max) => Math.random() * (max - min) + min;

  // calculate the distance between two points
  // using Pythagorean theorem
  // d = √x² + y², where x = x1 - x2, and y = y1 - y2
  const getDistance = (x1, y1, x2, y2) => {
    const xDistance = x1 - x2;
    const yDistance = y1 - y2;

    return Math.sqrt(Math.pow(xDistance, 2) + Math.pow(yDistance, 2));
  };

  let mouseClicked = false;

  // Main Functionality
  const drawAnchor = () => {
    // get the position for the anchor on the canvas
    positions.anchorX = width / 2;
    positions.anchorY = height * 0.9;

    context.clearRect(0, 0, width, height);

    // save context to remove transformation afterwards
    context.save();

    context.translate(positions.anchorX, positions.anchorY);

    // restores the empty context state
    context.restore();
  };

  const attachEventListeners = () => {
    // listen to the mousemove event and
    // set the mouse positions to the correct coordinates
    canvas.addEventListener('mousemove', (e) => {
      positions.mouseX = e.pageX;
      positions.mouseY = e.pageY;
    });

    // track mouse click events
    canvas.addEventListener('mousedown', () => (mouseClicked = true));
    canvas.addEventListener('mouseup', () => (mouseClicked = false));
  };

  const loop = () => {
    requestAnimationFrame(loop); // call the loop function indefinitely and redraw the screen every frame
    drawAnchor();
    if (mouseClicked) {
      fireworks.push(new Firework());
    }

    let fireworkIndex = fireworks.length;
    while (fireworkIndex--) {
      fireworks[fireworkIndex].draw(fireworkIndex);
    }

    let fleckIndex = flecks.length;
    while (fleckIndex--) {
      flecks[fleckIndex].draw(fleckIndex);
    }

    let fleckIndex2 = flecks2.length;
    while (fleckIndex2--) {
      flecks2[fleckIndex2].draw(fleckIndex2);
    }

    let fleckIndex3 = flecks3.length;
    while (fleckIndex3--) {
      flecks3[fleckIndex3].draw(fleckIndex3);
    }
  };

  window.addEventListener('load', () => {
    attachEventListeners();
    loop();
  });

  // classes
  class Firework {
    constructor() {
      const init = () => {
        let fireworkLength = 8;

        // current coordinates
        this.x = positions.anchorX;
        this.y = positions.anchorY;

        // target coordinates
        this.target_x = positions.mouseX;
        this.target_y = positions.mouseY;

        // distance from starting point to target
        this.distanceToTarget = getDistance(
          this.x,
          this.y,
          this.target_x,
          this.target_y
        );
        this.distanceTraveled = 0;

        this.coordinates = [];
        this.angle = Math.atan2(
          this.target_y - positions.anchorY,
          this.target_x - positions.anchorX
        );
        this.speed = 15;
        this.friction = 0.99;
        this.hue = random(0, 360);

        while (fireworkLength--) {
          this.coordinates.push([this.x, this.y]);
        }
      };

      this.animate = (index) => {
        this.coordinates.pop();
        this.coordinates.unshift([this.x, this.y]);

        this.speed *= this.friction;

        let velocity_x = Math.cos(this.angle) * this.speed;
        let velocity_y = Math.sin(this.angle) * this.speed;

        this.distanceTraveled = getDistance(
          positions.anchorX,
          positions.anchorY,
          this.x + velocity_x,
          this.y + velocity_y
        );

        if (this.distanceTraveled >= this.distanceToTarget) {
          let i = numberOfFlecks;

          while (i--) {
            flecks.push(new Fleck(this.target_x, this.target_y));
            flecks2.push(new Fleck(this.target_x + 50, this.target_y - 50));
            flecks3.push(new Fleck(this.target_x - 100, this.target_y - 100));
          }

          fireworks.splice(index, 1);
        } else {
          this.x += velocity_x;
          this.y += velocity_y;
        }
      };

      this.draw = (index) => {
        context.beginPath();
        context.moveTo(
          this.coordinates[this.coordinates.length - 1][0],
          this.coordinates[this.coordinates.length - 1][1]
        );
        context.lineTo(this.x, this.y);

        context.strokeStyle = `hsl(${this.hue}, 100%, 50%)`;
        context.stroke();

        this.animate(index);
      };

      init();
    }
  }

  class Fleck {
    constructor(x, y) {
      const init = () => {
        let fleckLength = 7;

        this.x = x;
        this.y = y;

        this.coordinates = [];

        this.angle = random(0, Math.PI * 2);
        this.speed = random(1, 10);

        this.friction = 0.95;
        this.gravity = 2;

        this.hue = random(0, 360);
        this.alpha = 1;
        this.decay = random(0.015, 0.03);

        while (fleckLength--) {
          this.coordinates.push([this.x, this.y]);
        }
      };

      this.animate = (index) => {
        this.coordinates.pop();
        this.coordinates.unshift([this.x, this.y]);

        this.speed *= this.friction;
        this.x += Math.cos(this.angle) * this.speed;
        this.y += Math.sin(this.angle) * this.speed + this.gravity;

        this.alpha -= this.decay;

        if (this.alpha <= this.decay) {
          flecks.splice(index, 1);
          flecks2.splice(index, 1);
          flecks3.splice(index, 1);
        }
      };

      this.draw = (index) => {
        context.beginPath();
        context.moveTo(
          this.coordinates[this.coordinates.length - 1][0],
          this.coordinates[this.coordinates.length - 1][1]
        );
        context.lineTo(this.x, this.y);

        context.strokeStyle = `hsla(${this.hue}, 100%, 50%, ${this.alpha})`;
        context.stroke();

        this.animate(index);
      };

      init();
    }
  }
})();
After saving all your files and re-launching the index.html file with Live Server, you should see the following:
Wow! You’ve just created your first firework show using HTML, CSS, and JavaScript.
| I hope that you have enjoyed this practice | tutorial as much as I did! Happy coding! 💻 |
🖤 All the Love for Olga Yavnel!
This is just a practice version of his/her work.
Follow Me!
💙 Instagram: @izzyluuuuh